Saving the planet... one garment at a time!

... and one upcycle at a time... Welcome to my blog: A place to have an "over the fence conversation" about sewing, altered couture, upcycling, and all kinds of crafts using found objects, beads, ephemera and other vintage finds!


Showing posts with label jacket. Show all posts

Friday, October 7, 2016

An Oldie but Goodie - Burda 8630

I was feeling rather guilty about my lack of sewing.  So I got out a pattern I'd done before.  I had some black linen laying about and I thought it would look nice as a jacket.  I used Burda 8630, which is at least 14 or 15 years old.  The first time I made is was in 2002 and I think it had been hanging around for a while before I actually made it.  I eventually get around to making things, but often not right away!  Here's the envelope picture:


This is a very loose and roomy jacket, best made with a fabric with a little bit of drape, but some structure, too.  The linen worked out quite well.


It looks nice on Betsy, my trusty dress form, but you can see how loose it really is.  I may move the button over so it doesn't hang off like on a little girl playing dress up.


I like the asymmetry.  Very Lagenlook, which is something that appeals to me right now.  Being black, it will complement many other items in my wardrobe.


I've been saving this button for some time, so now it has a home!  Thanks very much for stopping by to look!

Thursday, May 10, 2012

Semi Completed Project: Burda 8995

I completed the dress portion of Burda 8995 today.  Still to be finished is the black short jacket topper.
My plan is to finish up the jacket next week.  I need to do a couple of little projects brfore that.  Then, back to my lilac fabric and vintage Butterick 4228.  I do like how the fabric complements this 1960s style sheath.


Please let me know what you think!

Thursday, May 3, 2012

Cutting to the Chase

I needed to vacuum my bedroom today.  Not really worth mentioning except that I thought I might as well cut a few patterns first.  The logic in that is that my carpet is chocolate brown and shows every thread (and bit of goosedown from my comforter), so I thought I'd cut first and then vacuum.  Here's the color scheme in my bedroom below:


Here in the northeast we spend so much of the year in hibernation, that these colors work great for that!  However, it does mean you vacuum frequently to get rid of the fluffies on your carpet.

First I laid out a pattern I've been wanting to get to since last summer.  I bought it in a discontinued pattern bin, and even though it's not vintage, it definitely has that vintage sixties feel.  It's Burda 8995. 


I reminds me of a dress worn by Emma Stone in her role as Skeeter in The Help.


I'm doing the dress in a contemporary print somewhat like a barkcloth, and the jacket in plain black.


Then I cut a (hopefully wearable) muslin of the top of the Butterick 4228 I got yesterday in the mail.  I'm using fabric harvested from another one of those thrift store mom jumpers.  But confusion, consternation and kerflufflement ensued when I laid out my pattern pieces and found that the original owner had decided to alter the facings.  She cut each facing into two pieces!


Which I then carefully pinned together to make them whole again.  I will now trace these onto freezer paper to make replacements.


The fabric is a soft jersey, and I really like the little violets.  If it does turn out to be wearable, I have just the skirt fabric to go with it!


And now I'm done cutting, and my room is vacuumed.  What other trouble can I get into today?

Wednesday, May 2, 2012

Lessons From the Past - Suit Salvage!

So, one of my birthday presents to myself was Make and Mend for Victory which was published in 1942 by the Spool Cotton Company.  Chapter 5a deals with converting a men's suit to a woman's suit!  If you've ever been confusied about turning one garment into another, this chapter is for you.


In the chapter, old men's suits were converted to women's suits using three contemporary patterns of the day, Hollywood 949, Advance 2997, and Vogue 9137.  Prior to thinking about the pattern or the layout, one needs to acquire an old men's suit, too worn for daily wear, as is, but in goo enough condition to warrent a restyle.  For instance, severely worn cuffs on sleeves and pants might make the suit look too tacky for your man to wear, but if the main of the suit is in good condition, you're in business!  What?  Your man doesn't wear suits?  No problem!  Head on down to your thrift store and look for a larger sized men's suit.  These can often be had for a few dollars, when the wool suiting would cost scads if new!

Next, clean the suit in whatever manner you plan to use for your finished garment.  This will assure pre-shrinking, as well as give you nice clean fabric to work with.

Next, become best friends with your seam ripper and take the entire garment apart.  Save those buttons, and any detailing you think you can use.  Press all of the pieces flat for a proper layout.  Your pattern is laid out on the pieces as in this example (using Hollywood 949):


As you can see, the women's pattern fits into the pieces salvaged from the man's suit!  The sew your pattern as you normally would, you Goddess of Ecological Reuse!

Linked to:  Frugally Sustainable, The Thrifty Home

Monday, April 23, 2012

Another UFO Project: Butterick 4355


OK, so several years ago I started this pattern.  At the time, my job entailed dressing professionally for meetings and conferences.  Now my job entails sewing in jeans and a t shirt, mopping the floor in my jammies and walking the dog.  This will not exactly meet my everyday needs.  Perhaps an interview suit, should something open up locally in my line of work.  In any case I cut it ages ago, the dress and the jacket.  As you know, my goal is to sew through all my UFOs until there are no more, so, now's the time to finish this one.  Dress first, then the jacket at a future date.  What do you think?  Is it too dated?

Friday, April 6, 2012

Favorite Early Re-Style

Spring is so beautiful and cleansing!  Here's a picture from last weekend at my favorite retreat center!


I wanted to have something to show you at the end of the week, but I'm really spending a lot of time on my 1912 Skirt.  So, I thought I'd show you one of my first restyles.  It's not a major overhaul, but an enhancement that I love.  I wear this jacket constantly in spring and fall!  Even sometimes when the air conditioning is too intense in the summer.  It's my go to outdoor jacket.


You may remember that I LOVE dragonflies.  I had found the denim jacket in a thrift store for about $3.  And, though I wanted to wear it as a jacket and not alter the structure, it was a little plain.  So, I drew my little friend dragonfly amid the moon and stars. 


I made a pattern using paper and cut out each piece with an extra quarter inch allowance for tucking under.  Using the paper applique method, I stitched each piece of fabric onto the paper pattern, turning under the allowances as I went.  Then, I pressed the pieces and gently tore away the paper.  I placed the pieces on the starry sky background fabric and stitched them in place!


If you ever see the crazy lady with the dragonfly jacket at a yard sale or sewing show, that's me!  Stop me and say hello!

Thursday, February 23, 2012

Completed Project - Boxy Jacket

New Look 6619 is done!  I'm not sure why I relegated this to the UFO pile, but I'm glad it's out and done!  I'm happy with the way it looks with the previously completed skirt, and it fits nicely.  Here are some pictures:


My biggest critique of myself here is that I did not carefully match the plaid.  I remember not really caring at the time I cut it, which is very uncharacteristic of me.  I remember having enough fabric to cut it, but not to match.  All in all, not bad for a UFO completion project.  Have a super day!

Wednesday, February 22, 2012

Buttoning Things Up


Having worked all morning on it, the lining is in, tacked, hemmed, and generally looking good.  Or, at least I hope its looking good.  The jacket still needs some final pressing and the buttons and buttonholes.

Which is what led me to my button stash.  Modest I suppose, compared to my fabric stash(es), it's still always confusing to pick buttons for a project.  With the sailor dress, I really did not already have in my stash, the button that was needed for that project, but with this jacket, I was pretty sure I had something that would work.  That being said, it was more work than I anticipated to choose!


First I sorted a little by size and general appearance.  "The One" needed to be about an inch in diameter in order to be seen, but not so big as to steal the show.


Some were too brown for a grey suit, some were too bright.  I finally settled on these, a 7/8ths inch faux tortoise shell set.  I hope to finish this one tomorrow, but we'll see what the day brings!

Tuesday, February 21, 2012

Chipping Away


Just a short post today... I wanted you to see that I'm chipping away at the jacket.  The sleeves are in now, as well as the lining, though that is not complete, as it isn't completely sewn in and tacked in place.  After that, I plan to hem the sleeves, and then, more buttonhole and button fun!

Also, as you can see, the skirt I made to go with the jacket two years ago has been dug out of its place in the stash and pressed.  It looks nice on Betsy, and she needed something to go with the jacket. 

Better pictures once the whole ensemble has been finished, I promise!  Thanks for looking!

Thursday, February 16, 2012

Next Project: UFO #1, New Look 6619


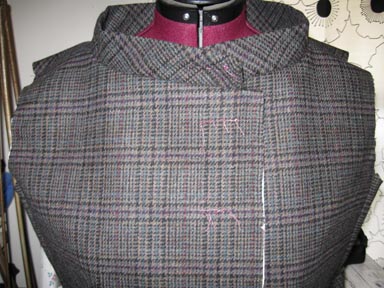
So, the first of my UFOs to be rectified is New Look 5519, a cute boxy jacket.  I believe I started this two years ago.  I had a great menswear wool suiting fabric on hand and I decided to make a suit.  I completed a nice pencil skirt, and chose this pattern to make a jacket from, and then cut it out and never began the sewing.  Though I have made many successful jackets in the past I remain intimidated by them - buttonholes and buttons and linings - oh, my! 

I have now gamely started the process of sewing and have put together the main body of the jacket, view C.  Next up is adding the sleeves.  I'll keep you posted!