Saving the planet... one garment at a time!

... and one upcycle at a time... Welcome to my blog: A place to have an "over the fence conversation" about sewing, altered couture, upcycling, and all kinds of crafts using found objects, beads, ephemera and other vintage finds!


Showing posts with label antique. Show all posts

Saturday, June 9, 2018

Vintage Pattern Handling

If you've been reading my blog for any amount of time, you know I always like to think of sewing as a sustainability skill.  While perhaps not as immediate and primal as knowing how to start a fire, or use dried beans, sewing certainly comes in handy if you are trying to get the most out of your clothing and textiles.  Like so many young women of my generation, I learned to sew in home economics class and in Girl Scouts.  My mother was a home sewist, and sewing was deemed an inexpensive method of expanding one’s wardrobe.

Expand I did! I made dresses, formals, skirts and even costumes.  Here's the pattern for the first dress I ever made!  At the time, my clothing budget for school and social occasions was very small and I was a student of international folk dance with a limited budget for ethnic dance ensembles.  


As an adult sewist I have gained an appreciation for vintage patterns.  I use them to create period costumes, and also to enhance my everyday wardrobe.  I’m always thrilled when I find a pattern that excites my imagination.  The fact that the pattern is still around (and not at the bottom of some landfill) is impressive.  Even more impressive is the fact that this pattern can still be used to create a special piece of clothing evocative of a long-ago style. 


I scour estate sales, thrift shops, and yard sales to acquire vintage patterns.  I keep many for myself, and I also sell them in my Seams Sustainable Etsy shop.  When I get the patterns home, I open each one and go through it to ascertain that all the pieces and directions are present.  Some vintage beauties are very challenging because of unprinted pattern pieces and minimal directions.  In times when many women could sew, the directions seem very minimal compared to the step by step directions included with more modern patterns!  Also, they require some special handling due to age!


I then consider whether the pattern will withstand use.  Tissue paper is usually acid-free and remarkably resilient.  However, the pattern’s past use and storage play a role in its present utility.  I have encountered pattern pieces crumpled into the envelope, wadded together from water damage, and torn either due to past pinning or due to labeling perforations becoming tears. In all of these cases, I very gently peel back the onion layers and try to separate the pieces.  Some patterns will just not be salvageable, but most I find I can gently separate. 

Once I’m sure that everything is present and can be separated, I decide whether to keep a pattern or resell.  Though grading a pattern up is very doable, I generally only keep patterns close to my measurements unless I am seeking a challenge.  My sewing time is short enough without adding complex fitting problems! 

Whether I am reselling the pattern, or keeping it, I next flatten the pattern, either to fold it back into the envelope or to use it.  For this, I will often use my iron, on a very low dry setting.  If the pattern seems fragile, and I plan to use it, tracing it onto newer tissue, exam table paper, or other pattern paper will help to preserve the original for posterity.  If the pattern is made of sterner stuff, I recommend using pattern weights instead of pins to keep your pattern intact.

Enjoy your summer sewing!  Do you sew with vintage patterns?  If so, what methods do you use to preserve them?


Monday, August 17, 2015

I've Got a Notion - Hand Sewing Needles

I love estate sales, yard sales and rummage sales (if you've ever read this blog before, you know this). One of the things I buy frequently at these sales is sewing baskets. Sadly, a sewist passes on, and her family has no earthly clue what to do with her things. Often, whole sewing baskets can be found in these sales, fully stocked with all sorts of great tools and notions, left just the way the owner left it.


I've acquired neatly organized baskets, and ones that look as though the grandkids just pawed through it looking for only they know what. All have their charms and treasures within. One of the things I come across most frequently and abundantly are hand sewing needles.

I will never have to purchase another hand sewing needle at a conventional modern sewing store. I have hundreds (maybe thousands) of these gems. Some will remain in their wrappers unused, and others will be used in my work. Some will be passed on to others via Etsy.


Hand sewing needles come in greater variety than the uninitiated would think. Each needle is crafted for a particular purpose. The most common is the “sharp”, used for general hand work, with a round eye, a sharp point and a medium length. Applique and crewel needles are used in embroidery and surface design. Tapestry needles are used for needlepoint and other canvas work. Betweens are hand quilting needles. Milliners needles and beading needles are very long and are usually used for decorative work. Darning needles are long with blunt points and used in fabric repair and reweaving.
And, of course there are specialty needles for upholstery and leather work.


Each needle type comes in a variety of sizes. The size is indicated by one or more numbers on the manufacturer's packaging. The general convention for sizing of needles, as with wire gauge, is that within any given class of needle the length and thickness of a needle increases as the size number decreases. When a package contains a needle count followed by two size numbers such as "20 Sharps 5/10" the second set of numbers correspond to the range of sizes of needle within the packet, in this case typically ten sharps needles of size 5 and ten of size 10 (for a total of 20 needles).

The packaging of needles is also fascinating, from ornate needle books, to advertising premiums. Some of the packages feature great artwork, which seems so grandiose when you consider that the contents are but humble sewing needles.   


I've been doing quite a lot of hand sewing lately for the Downton Dress.  Between that and my estate sale habit, I have developed a new appreciation for the hand sewing needle!


Friday, July 3, 2015

Tunic with Embedded Recycle

As part of my stash and UFO busting crusade, I came across a cotton T Tunic I had cut, probably years ago.  In case you were not aware, a T Tunic is a tunic cut using a shirt from your wardrobe as a pattern.


In this instance I wanted to incorporate an antique pillowcase that had a few holes in it.  I love clothing made from antique linens, and the white of the pillowcase and the dainty embroidery contrasted nicely with the blue check.


I cut off the body of the tunic, turned it sideways and stitched a center back seam.  Then I added in the area of the pillowcase I wanted to use.  I gathered the new body of the tunic and attached it to the kimono arms.  Here is the resulting tunic.


I've already worn it, and it's light and airy and comfortable for summer, but could carry into fall with a long sleeved top underneath. This was a quick project to do, allowing me to wind down from more intense painstaking work on the Downton Dress.  Thanks for looking!

Wednesday, April 15, 2015

1920s Gown ala Downton Abbey Style

It's been a very, very long time since I've had any time to catch up with you!  I hope you have been well. I've been terribly preoccupied with a day job which no longer fit my needs, so I'm back with you, able to blog once more!  I'm very excited about the project that I am working on for a dear friend.


It's number 5941 from the Vintage Pattern Lending Library, a 1920's evening gown.  These patterns are tricky.  As stated in the materials enclosed in the pattern envelope, "the original instructions consist of two diagrams and eight lines of simple instruction".  Sewists contemporary to the era of the pattern would have needed little instruction for constructing and finishing this gown.  Included in the envelope is a tutorial for a muslin, but there are no instructions for a finished gown, so a lot is left to me.

I cut the pattern from the muslin material (a flat King sheet I got for a couple of dollars - great source of fabric for muslins when purchased cheaply at yard sales or flea markets) last week, and began construction yesterday.  This will not be a wearable muslin (alas) as I'll be using the deconstructed pieces as the final pattern - this one's for fitting only.  It's also helpful for identifying all the raw edges that will need some sort of finish. Here's what I've got so far!


The actual fabric I'll be using is gorgeous, with a lot more fluidity and drape than the sheet.  It's some lovely Sari silk, which I'll show you in the next post on this dress.

I also realized that I have not shown you my new sewing room!  For Yule this year, my husband had a room in the basement finished for me for sewing.  Here are two little peeks at a couple of the furnishings.  The first is a cabinet we found in the basement of the home when we moved in.  All cleaned up, it makes a great bookcase for many of my sewing and craft books.


Then, for pattern storage, we picked up this antique catalog from TOPS in Hudson Falls (my favorite second hand store, where estate finds are mixed in with new furniture - here's an earlier post about this wonderful business!).  I'll show you more, when the room is cleaned up a bit and more presentable!


I'm looking forward to sharing more on this gown project, the sewing room, and many other projects in the pipeline!  Thanks for stopping by!


Friday, April 18, 2014

Favorite Store in the News!

I speak often about my favorite store for great estate finds in my area.  I was so pleased to see an article in out local paper about the store. Not only is this store an excellent Sunday afternoon browse, but the people behind it are some of the nicest people you will ever find in this type of business.


When my husband and I bought our new (to us) Victorian home, we were faced with a few problems in furnishing it.  First, it is much larger than our previous home, and second, we wanted to restore it to some of its previous Victorian era glory.  We turned to Chris at Tops.


This chair was found in the basement of the store!


These lovely and comfortable chairs had just come into the store the day before we made one of our nearly weekly visits!


My husband fell in love with the Victorian era armoire and the heavy four poster bed.


We found this Victorian birdcage soon after buying the house, as well as the side-by-side secretary below.


 Almost every stick of furniture in the house was obtained from Chris, all at fair and reasonable prices.  Had we gone to snootier antiques dealers, we would not have been able to afford all of the wonderful furniture we now enjoy (not to mention my two wonderful vintage Singer sewing machines!!!), not to mention the many other non-furniture decor items we purchased there.


Please visit Chris at Tops! See the link to the article for store location and hours.  What's your favorite source for new old stuff?

Tuesday, March 11, 2014

Puzzle Me This

Since acquiring my two wonderful vintage Singer sewing machines, I've been on a quest for accessories.  While trolling eBay, I came across a listing for two Singer puzzle boxes.
A Singer puzzle box is a neatly crafted box of feet and other accessories produced by the Singer Manufacturing Company during the 19th and 20th centuries. The box was invented in 1888 by John M. Griest, a Singer employee who was awarded US patent 397980 on February 19, 1889 for the design. 
The accessories stash into a fold out rectangular wooden box which is lined in velvet or felt (if the lining is still intact).  An alternate name for these is a "style box".  The boxes include attachments for hemming, braiding, underbraiding, tucking, shirring, binding, quilting and ruffling, along with screwdrivers and spare needles.  Mine are not in the most pristine condition, but I will continue to look for more of these fascinating treasures!

Now I just have to clean them up and learn how to use them!  Any tips?

Friday, February 28, 2014

Snake Oil


Snake oil!  The term "Patent Medicine" has been used frequently to describe drug compounds marketed (mostly) prior to the Pure Food and Drug Act of 1906.  Perhaps "proprietary" is a little better term, because it denotes the the more common trademarking of  "secret (often old family) recipes".  I'm fascinated with this phenomenon, and I collect ephemera and memorabilia associated with the Lydia E Pinkham Medicine Company of Lynn, Massachusetts.  Lydia's medicines were marketed to women to cure all manner of "women's complaints".  Enterprising Lydia started out cooking each batch on her kitchen stove and sending her sons door to door with her brew.  Eventually her company became a booming concern in Lynn, selling throughout the country.


You had to love the elaborate and artistic marketing materials!  Trade cards with cherubic children, kittens, and smiling healthy people.  Not only are most of these concoctions laced with plenty of alcohol, but they often contained opium, heroin, morphine or cocaine.  They were marketed for people of all ages, including babies.


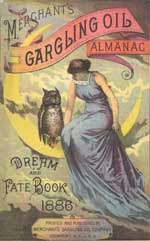
While browsing my favorite estate shop, I came across some sewing machine oil, which was being stored in a bottle which originally contained one of these magical elixirs.  The owner had taken care to scratch out the label, but the original label is still very readable.  Active ingredients?  Opium and alcohol...


So, of course, I brought it home!


Have you found anything fun lately?

Saturday, February 8, 2014

Isn't that Pinteresting? - 2

Here's another of my pins on Sew Inspired: something I thought was just a super idea, especially for the vintage sewist!  This idea came from Destri, writing a guest post on Miranda Walker's blog.  There's a full tutorial on how to make one of these nifty pin plates at the link.


It uses magnets glued under the plate to make the pins stick!  How cool is that?  If you've ever stepped on a stray pin in the sewing room, you think it's pretty cool... What inspiring sewing room gadgets and notions have you pinned?  And don't forget to share your pinboard url so we can all check in and follow you, too!

Thursday, February 6, 2014

Upcoming Project: Quilt Completions

I love almost anything previously owned.  I frequent thrift and consignment shops, estate and yard sales, and antique shops.  In one of my favorite shops, tucked away in a corner box was the hard work of a quilter. At the top of the box were a stack of 30 perfect little log cabins.


Of course I purchased these (for a ridiculously low sum).  Since obtaining them, I went out and bought a jelly roll of sherbet colored batik strips to finish a quilt top.  Do you think it's cheating to start with those wonderful pre-made squares?


Under the little log cabins was another wonderful example of piecing excellence.


It's still in star shape, not even on the edges, so it too needs to be pieced with other fabric to complete the quilt.  What would you do with it?

Saturday, January 11, 2014

Making Over Victoria: Laundry Rules


 One of the more minor decorating projects around the new home has been completing our laundry room. This is also temporary home to my sewing area – in the spring we hope to begin renovations to our 140 year old basement to put in a finished room down there which is planned to be my new sewing room.  The planned room will be large enough to accommodate an actual cutting table, as well as multiple sewing machines and ample fabric stash storage!


I believe this pretty much un-insulated laundry area was once an upper-level back porch, with its five bright windows, and near access to the back stairs.  I’m not sure when it was converted to a laundry, but that was the purpose the previous owners assigned to the room as well.  I think the it is coming out pretty cute, so I’d like to share a few pictures from the room… while not haute couture, I am sewing the curtains for this room, using one of the latest Pinterest trends, burlap and lace.  These are the completed valences.  The burlap was purchased from www.burlapfabric.com, and the lace was a yard sale find.  I scored a whole spool of it for pennies.  As you can see, there’s plenty left to complete the curtains, and then some.


This legless dresser was left behind by the previous owners of the home.  It makes a great place to store sewing supplies, and an equally nice window seat.  I’m planning on covering a cushion to make it even cozier.

While I lack a “before” picture, the walls in this room were formerly stark white. We definitely wanted to jazz things up a little, and we wanted to pay homage to the Victorian era without sacrificing modern convenience.  Corrugated galvanized steel roofing is the paneling we chose for the walls, with a periwinkle blue upper wall.  We first saw this used as a wall treatment in a regional fish fry restaurant. Galvanized buckets are used as light shades, and antique washboards, wringers, and clothes drying racks help to tie the theme together. 


We chose to stack our front loading washer and dryer because this saves floor space, and allows free access to the attic via the pulldown ladder in the ceiling of the laundry.  Please feel free to comment and let me know what you think about this room renovation.


Thanks for stopping by!