Saving the planet... one garment at a time!

... and one upcycle at a time... Welcome to my blog: A place to have an "over the fence conversation" about sewing, altered couture, upcycling, and all kinds of crafts using found objects, beads, ephemera and other vintage finds!


Showing posts with label accessories. Show all posts

Wednesday, July 29, 2015

That Downton Dress - III

I continue to work on the Downton Dress.  All the hems have been very time consuming, but they continue to progress, and the results are very satisfying! Now I'm beginning to think about the embellishments.  The front of the dress has a draped belt and it needs clasps.  The woman I'm making the dress for bought gorgeous 1920's clasps on Etsy.  These are the real deal, and look as thought they were made for this dress!


Evening dresses in the era were often beaded and embellished.  The print on this dress is quite ornamental itself, but I purchased some other embellishments which will match nicely with the clasps.


One thing I'd like to do is put a single rhinestone on each point of the handkerchief hem, along with three bugle beads.  The larger piece will be on the back of the dress to stabilize the v-back.


This is a fun project, and one that I hope will yield stunning results!  Thanks for checking in!


p.s.  Any thoughts on the new logo?


Monday, September 10, 2012

Finally... the Wedding!

Well, it finally happened after all that preparation and work!  The wedding took place on the evening of August 31st at 7 pm.  As you all know, I slaved over my dress, which used reclaimed satin from my mother's wedding gown, with new embroidered lace netting.  It was a beautiful evening, a beautiful ceremony and a terrific time with friends and relatives.  Here are a very few highlights, before we return to sewing.  Here's something you'll probably never see again... me without my glasses!

 
We were so lucky to have been gifted by special friends with our lovely cake by Niamh Swan.
 

A spectacular dessert table by Claudia Matthews.


And a killer punch by Randy Schryver.


The setting was Universal Pathways in pastoral upstate New York. 


We hope that everyone had as wonderful an evening as we did!  We are very grateful to our friends and families. I am also grateful to all of you, who have read along as I've worked on this project, offering advice and encouragement as I put this together on a shoestring budget!


Photo credits: Bill Lawrence, Lauren Albright, Maryann Fairman, Sam Simmons, Dee Tocci

Monday, August 13, 2012

Another Wedding Accessory: Footwear!

Weather permitting, we are being married outdoors in a bucolic garden setting.  I don't wear heels often anyway, but heels would only aerate my hostess's lawn, and end up looking all muddy and nasty.  So, what would look great for an outdoor wedding and be comfortable?

Today I'm making something I saw on Pinterest some time ago, and just loved. Now I don't want to take anything away from the fine company that made the original, but I simply couldn't afford over $40 for these, so I decided to make a version of my own using elastic nylon beading cord, the same types of seed beads from my dress, and some glass crystal beads.

First, measure out enough of the elastic cord to go around your second toe, up the foot and around your ankle.  Then decide on your beading patterns and get to it!


When you have enough to go around that second toe, close the loop with a crimp bead.


Measure how long you want the connecter from ankle to toe to be and bead that in a showier pattern.


Then, place another crimp bead but don't close it.  Bead the stretch that will encircle your ankle and then bring the end through that crimp bead you placed earlier, and close it, and you're done!


Please excuse my lack of pedicure... my feet will get the full treatment before the big day!


Now, these were time consuming to make, but they consumed about $10 worth of materials.  If one were making them for someone else, one would need to add timed costs for the labor, but as a DIY, it was quite economical.  Let me know what you think!

Friday, August 10, 2012

Something Blue

We're not doing a garter toss or anything... we're a little old for all that.  But every bride needs something blue, so I decided to make a garter.

I had this lace from an earlier garage sale day.


And a spool of blue satin ribbon.


I made a casing out of the ribbons, added the lace, and a few little embellishments... voila!  Something blue.


I'm pleased with how it came out, and it was quite a bit cheaper than the store bought ones.  I would guesstimate about $3.00.  More accessories to come... what did you wear for something blue on your wedding day?


Monday, August 6, 2012

That Ultimate Restyle

My cold is mostly better now, and I'm still working on the finishing touches to my wedding dress.  The wedding is coming up very soon, though I'm sure it seems like you've heard about this dress forever.  I've been hand sewing lace and other embellishment to the dress.  Here are a few quick detail pics.


I can't wait to wear it at the end of the month!  Until then, there's lots more I'm working on... for instance, I did our invitations a few weeks ago.  I designed them myself and printed them on my printer at home.


The theme is tandem bicycles... popular, to an extent it seems.  I got a great tandem bike cake topper on Etsy from heatherboyd.


I have SO many more things to do, and I'm taking you all along for the ride (tee hee).  Hey, my dress needs to be pressed... have you ever used a dry cleaner just for pressing?  I lack the equipment I think.  Anyway, thanks for stopping by!

Thursday, July 19, 2012

And Now For Something Completely Different...

To quote the lads from Monty Python!  I finally completed the decoupaged notions box!  You may recall that one of the boys made me a box in woodshop.  A little rough hewn and slightly lopsided in places, but a nice large wooden box, with a drawer.  Immediately, my thoughts went to what things could be stored in such a box. Since sewing holds a huge place in my heart and brain, it occured to me that one big box for notions and machine parts would be great to have and would eliminate the need for about four other boxes I currently keep about my sewing table.

Here are the pictures of the original box.


The first step was to decoupage on some tissue pattern pieces from patterns that had some pieces missing already.


Eventually I coated the whole box with these.  Then I printed out some sewing graphics onto parchment from my favorite free Graphics site, The Graphics Fairy.  After all images were affixed, I "aged" the box a little by spraying with a brown stain, and adding some small areas of rubbed off paint.  And here is the completed box!


One or two more coats of acrylic varnish and it will be ready to hold all my sewing tools!  This was a fun project that while sewing related, did not involve one single needle and thread!  Occasionally, it's nice to do something other than your main craft, don't you think?

Tuesday, July 17, 2012

100 Posts (and a giveaway)!!!

Just last week I celebrated one year of blogging fun!  Today I'm posting my 100th post!  Due to some technical difficulties relating to my camera memory card not wishing to speak to my computer today, that 100th post will not be what I had planned to talk about.

First, the fun part.  In addition to sewing, I dabble in a bunch of other crafts, including jewelry making.  I especially like to use upcycled materials in my creations. To celebrate 100 posts, I'm giving away a pair of handmade (by me) earrings, just like the ones I made for the wedding.  They are reclaimed faux pearls with reclaimed faceted glass beads, on sterling silver ear wires.  Just the thing for a dressy occasion.


To enter, leave me a comment telling me what sorts of posts you'd like to see more of on this blog.  This giveaway is open to anyone, anywhere.  Please also be sure that your e mail address is there someplace so I can contact you for the shipping particulars. 

Now the not so fun part.  Lately it seems that I'm not getting many comments on the blog.  Is it because of the preoccupation with the wedding preparations?  Sorry for that.  It'll all be over after August.  Is it because I'm too shy to post too many pictures of myself in my creations?  Is it because I'm an old lady and I'm out of touch with what real people wear?  Please let me know so that I can serve you better, cause I'm really getting a little down about it.  I sincerely want your opinions.  Thanks!

The deadline to enter the giveaway is midnight EDT on July 21st.  Good luck, and thanks again for your suggestions!

Thursday, June 28, 2012

Wedding Jewelry: The Earrings

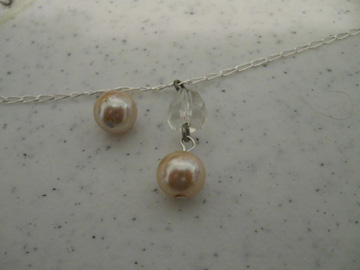
I completed the earrings for the wedding jewelry ensemble.  The drops echo one of the elements on the third strand of the necklace, which you can see in the photo.


Now, on to beginning the dress.  Years ago, I deconstructed my mother's wedding gown to make a tutu for my daughter.  I carefully saved the pieces of the gown that I was not using.  So, here is the ivory satin from my mom's gown.


Quite wrinked, but I'm afraid a wash was in order.  Stay tuned for some of the details of the construction, though the final reveal of the dress will not be until after the wedding.

Wednesday, June 27, 2012

Wedding Jewelry: The Necklace

So, I've had these old costume pearls laying around for years.  I always figured I'd do something more contemporary with them.  Depending on how this finished necklace looks with the neckline of my wedding dress (which is still in the planning phases) I will plan to wear it... I'm still planning to make "matching" earrings and footwear to go with this.


The design incorporates glass bugle beads and moonstone beads along with the reclaimed faceted glass and costume pearls.  All materials were on hand, so no new financial outlay was involved. What are your thoughts?

Tuesday, June 26, 2012

Wedding Jewelry


Today I'm working on something slightly different from the usual sewing projects.  I'm making jewelry for my upcoming handfasting in August.  I'm upcycling some old costume pearls,faceted glass beads, sterling chain and findings into a new, collar style necklace, with matching earrings and footwear.  Here's a peek at the beginning of the necklace.  I'll post the finished piece soon!


Monday, June 18, 2012

Completed Project: Simplicity 2249

The yellow dress is completed!  On this project I used an invisible zipper.


And I used some of the garage sale buttons I got for the shoulder detail and the front placket of the dress.


And here's the completed dress.


I am happy with it, and since it was made from recycled sheets, I will be more willing to wear it for everyday.  Materials costs are as follows:

Main dress fabric $2.00 (yard sale sheet set)
Accent fabric $1.00 (yard sale tablecloth)
Buttons, $0.25
Zipper on hand in stash
Thread $1.59
Cording $2.99 (but will use in mutiple projects)

Total: $7.83

Thanks, as always, for looking in.  Your comments are appreciated!

Saturday, June 16, 2012

Dress Progress

Working on Simplicity 2249 today!  I completed the front of the dress.  The piping came out cute on the top.


Here's a shot of the entire bodice.


I plan on using these garage sale buttons along that front tab of the dress.


I'm planning on doing the back, sides, and finishing on Monday... but we'll see!  The weather is incredible right now and I want to take advantage of that as well.

Oh, here's a close-up of my garage sale earrings, too.  Won't they look nice with that lavender outfit I just finished?  I meant to include that pic yesterday and somehow omitted it.

Tuesday, June 5, 2012

Progressions

Lot's of progress to report today.  The top to Butterick 4228 is coming along.  Here's a shot of the top zipper.


I know, it looks a lot like the skirt zipper!  But honest, it's two different things.  I hope to complete this one sometime tomorrow.  I already love it!

I've also been working on my decoupage notions box.  Making some real progress there as well.  I'm enjoying doing this, as it's a little different from my daily routine.


I also promised apeak at my garage sale treasures from last week.  I went to about seven sales last Friday, and only bought things at two.  At the first I got a duvet and sham set covered with ribbon embreoidery, in really good shape.  Not sure yet what I'm going to do with it.


At that sale, I also got yet another "mom jumper".  I really love these for restyling.  The possibilities are almost endless.


The second sale at which I purchased yielded a non-sewing treasure!  For $5 I got this pretty wooden box (which I do not plan to alter in any way!).


But the best part was inside the box.  A myriad of little tools and cutters.  I plan to use these in my paper crafting and jewelry making.  I was so psyched that the contents were included in that price of $5.00!


So, there's the booty for the week.  I'm excited to see what I can do with the ribbon embroidery stuff.  Any suggestions?